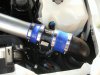

So some of you might remember my stock MAF died on me and instead of risking it using my OEM spare and get stranded at some point when that one gives up I picked up the new style plastic Delphi 3" MAF and the MAF Translator while @ BPG in Hebron OH (Brian @ gbodyparts.com hooked me up and saved me shipping costs).
Anyway long story short my objective was to do a very clean install to keep it clean and less wires etc in the engine compartment and also minimize the risk for the MAF Translator to get damaged under the hood being electronics and our wet weather on this side of the pond.
So the plan was to wire up the new MAF (this is the 5 pin plug version) directly to the OEM wire harness replacing the 3 pin OEM MAF plug with new 5 PIN plug and install the MAF Translator next to where the Cruise Control box, electrical antenna relay etc sits under the plastic "Performance Suspension" Emblem panel on the passanger side inside of the car.
This involves cutting 3 wires at the ECM connector point and installing 3 pin connectors there (this way I can plug this together and bring the car back to stock if needed) then replace the connectors on the new MAF Translator to match the connectors just installed on the ECM harness so they plug stright in there and mission completed.
Attached is a PDF with the schematics I did, top half shows the normal install of the Delphi MAF and the translator and bottom half shows the modifications needed to do my "stealth" install.
Good thing is I can revert this fairly easily and you can access the MAF TRanslator removing just 3 screws and the panel if you need to make any adjustmenets to the settings in the box.
Hope this helps someone else out there.
Note if you are using the 3 pin LT1 or LS1 MAF just make the necissary adjustmenets replacing the OEM MAF 3 pin plug with the correct 3 pin plug for the LS1/LT1 MAF.
Two pictures shows the MAF Translator installed inside of the car (passanger side under the plastic panel) and the engine compartmenet with my setup.
Anyway long story short my objective was to do a very clean install to keep it clean and less wires etc in the engine compartment and also minimize the risk for the MAF Translator to get damaged under the hood being electronics and our wet weather on this side of the pond.
So the plan was to wire up the new MAF (this is the 5 pin plug version) directly to the OEM wire harness replacing the 3 pin OEM MAF plug with new 5 PIN plug and install the MAF Translator next to where the Cruise Control box, electrical antenna relay etc sits under the plastic "Performance Suspension" Emblem panel on the passanger side inside of the car.
This involves cutting 3 wires at the ECM connector point and installing 3 pin connectors there (this way I can plug this together and bring the car back to stock if needed) then replace the connectors on the new MAF Translator to match the connectors just installed on the ECM harness so they plug stright in there and mission completed.
Attached is a PDF with the schematics I did, top half shows the normal install of the Delphi MAF and the translator and bottom half shows the modifications needed to do my "stealth" install.
Good thing is I can revert this fairly easily and you can access the MAF TRanslator removing just 3 screws and the panel if you need to make any adjustmenets to the settings in the box.
Hope this helps someone else out there.
Note if you are using the 3 pin LT1 or LS1 MAF just make the necissary adjustmenets replacing the OEM MAF 3 pin plug with the correct 3 pin plug for the LS1/LT1 MAF.
Two pictures shows the MAF Translator installed inside of the car (passanger side under the plastic panel) and the engine compartmenet with my setup.