TTA 1040 Arrives, let the "Rayder" Project Begin

Kman1971

Well-Known Member
#1
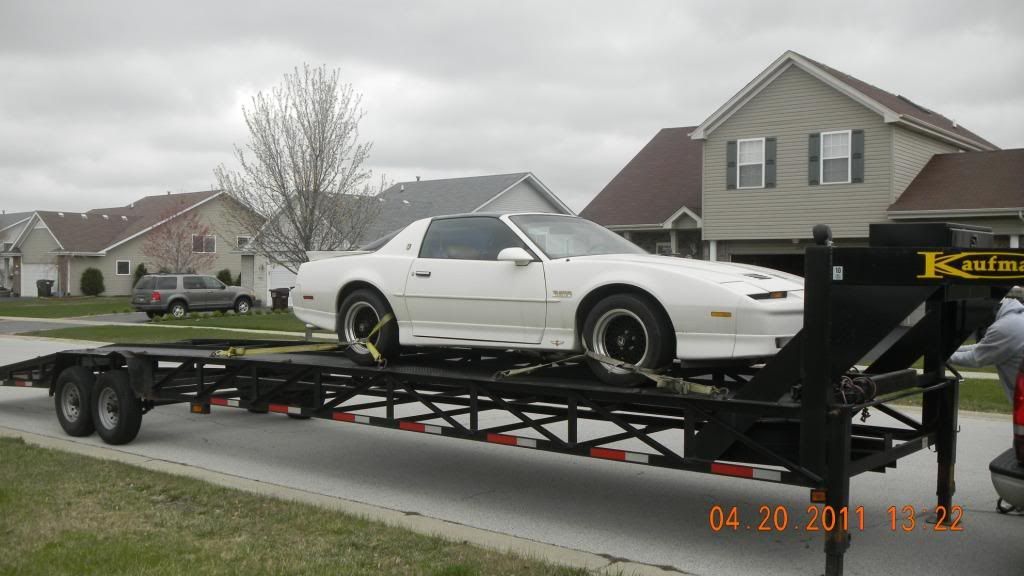
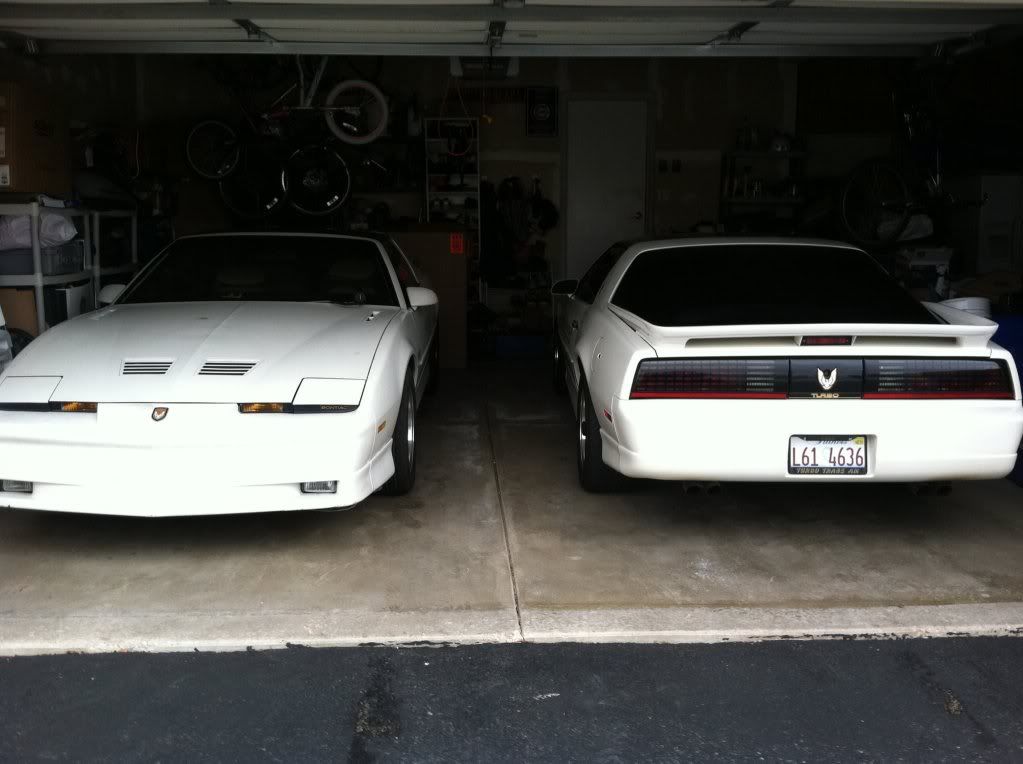
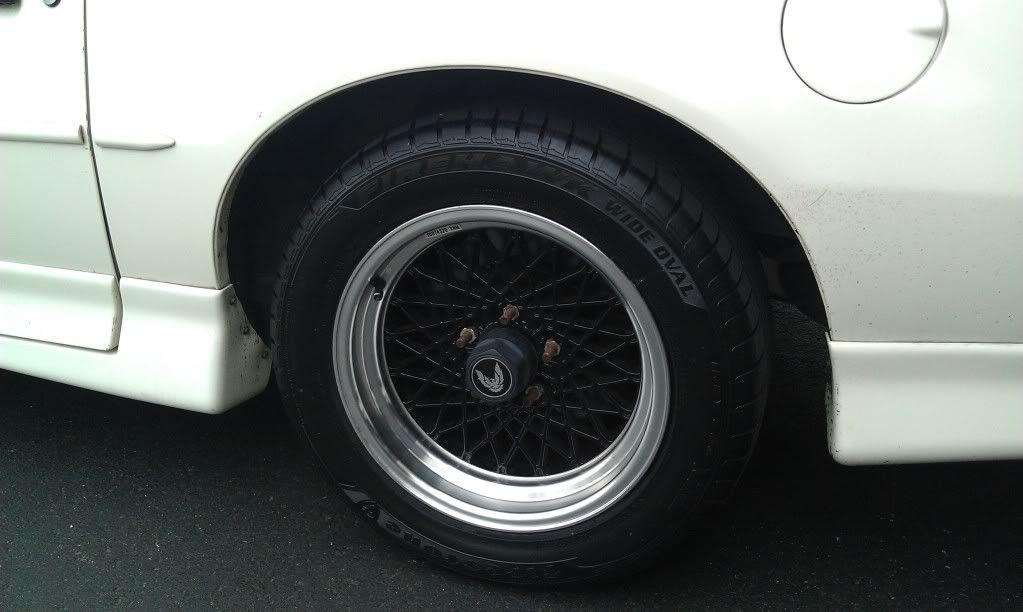
I bought TTA 1040 with 56K miles on it for $4000 on 4/4/11. This car was heavily modified and raced hard at the track. This will be my new project, codenamed "RAYDER". Rayder is a synonym for Bandit and also ties into the GNX history of the X-Ray(A GNX painted White) as well as a play on words of Vader as the GNX was referred to as the Dark Lord of Buick Grand Nationals. I am going to transform this one into a GNX/TTA street/show car that is a tribute to the Car where the best Buick Engine Turbo 6 ever came from as well as our favorite Pontiac, the TTA. It already has the GNX style wheels on it and will get a GNX style paint job once the mechanical problems are restored. Dennis Butt will be my lead mechanic on this project from Elwood, IL. He comes highly recommended as one of Chicago's, if not the countries expert in Turbo Buick's and he just happens to live in the next town to me. I think the GNX Black color and the gold 20th Anniversary emblems will give a special tribute to the Bandit Trans Am's of the past.

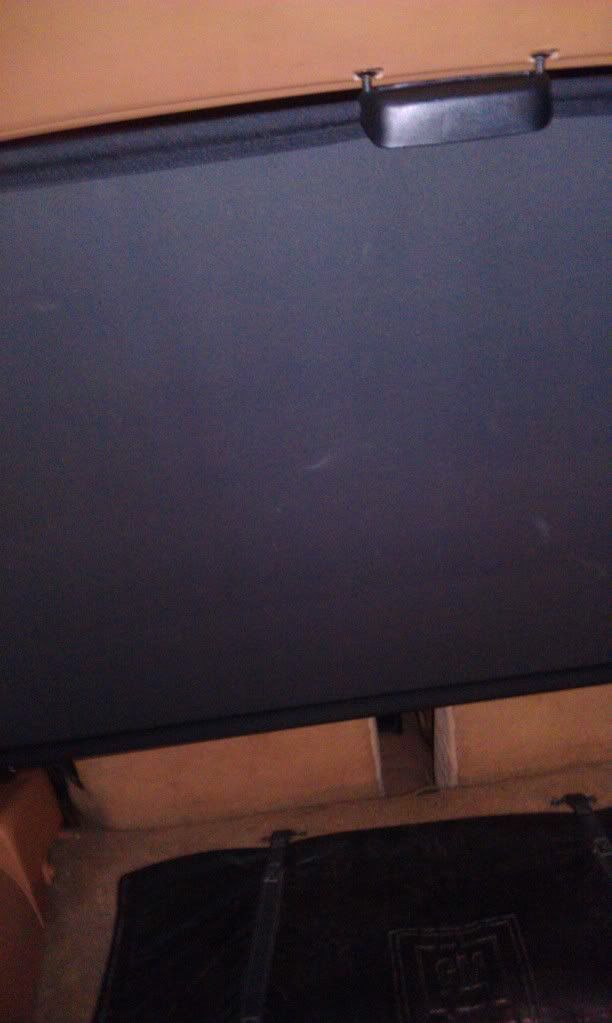
The body needs a few repairs before painting. The front spoiler by the right fog light is cracked. The Rear Spoiler is cracked and worst one I have seen yet. The rear window on the drivers side by the defroster looks like a heavy film on it or a bad tint, not sure but that will have to be fixed. There are few dents and dings on the driver door and hood. It also has fuel pressure gauge run from under the hood and placed on top of the hood for the driver to see. I won't need that. The Power antenna is stuck half way up. you can hear the motor run every time you shut it down. So hope it can be repaired. The fog lights work, but the headlights don't go up. You can hear the motor and see the knobs spin, so hopefully they can be repaired too. I was in and out of the hatch about three times and the latch and motor worked for two of them. It is now stuck in the closed position. I went to move it today and the battery was dead. I think the light on in the hatch since it can't be closed drained it so I unplugged it. Charged it back up and it started right up.So that will need to be repaired/replaced.

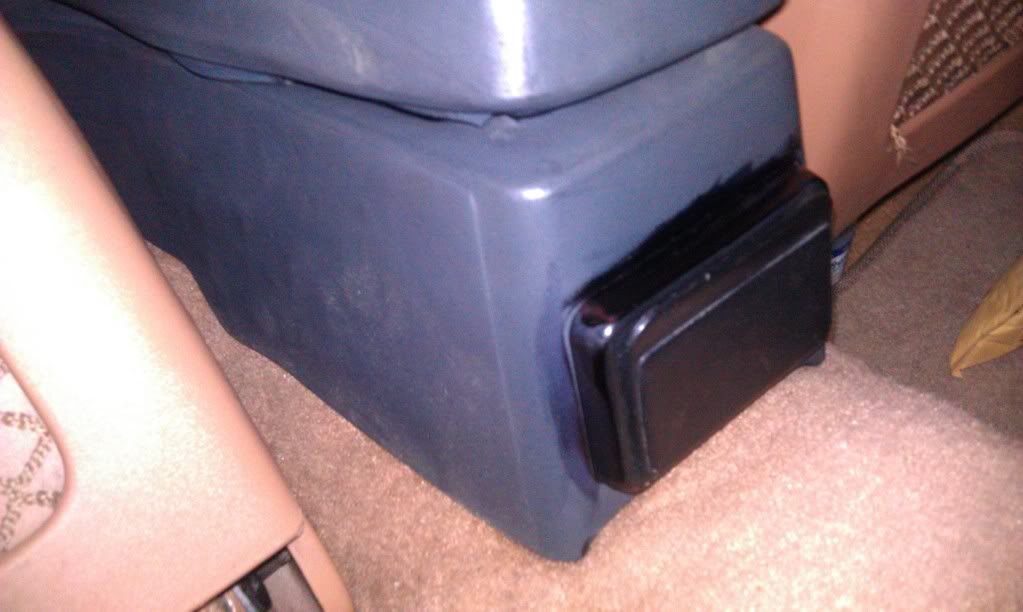
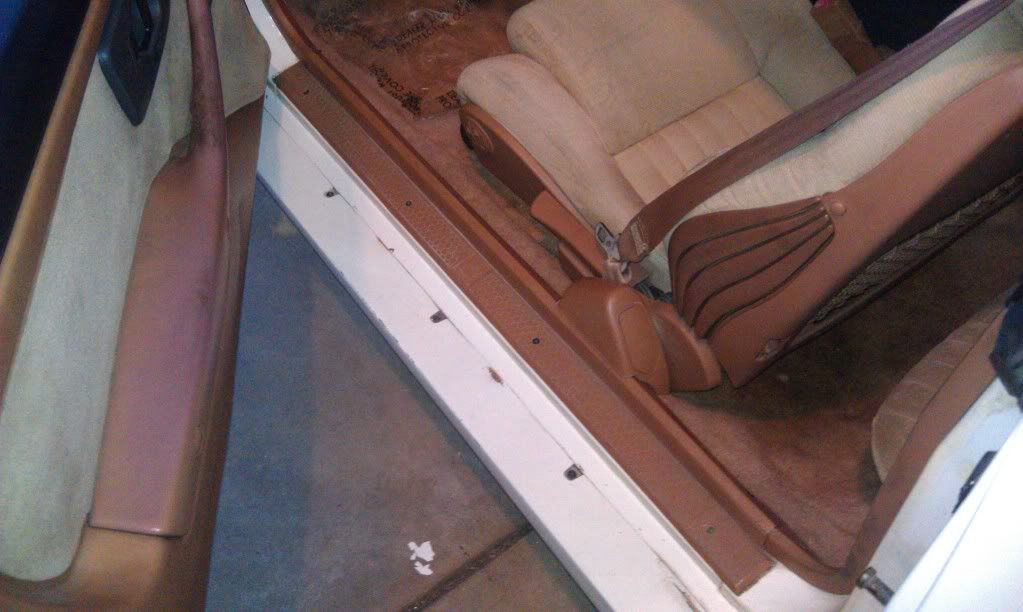
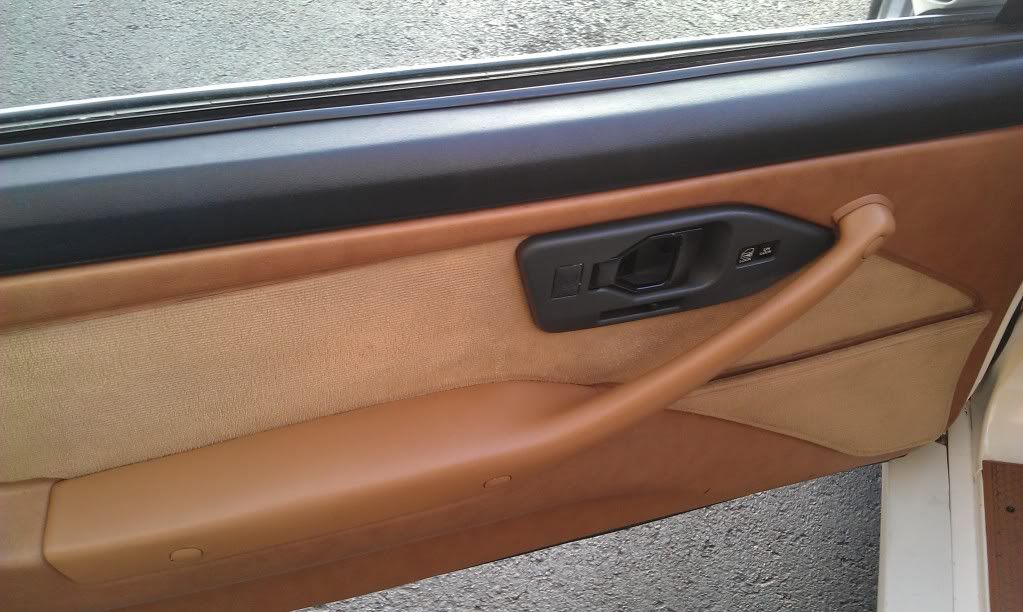
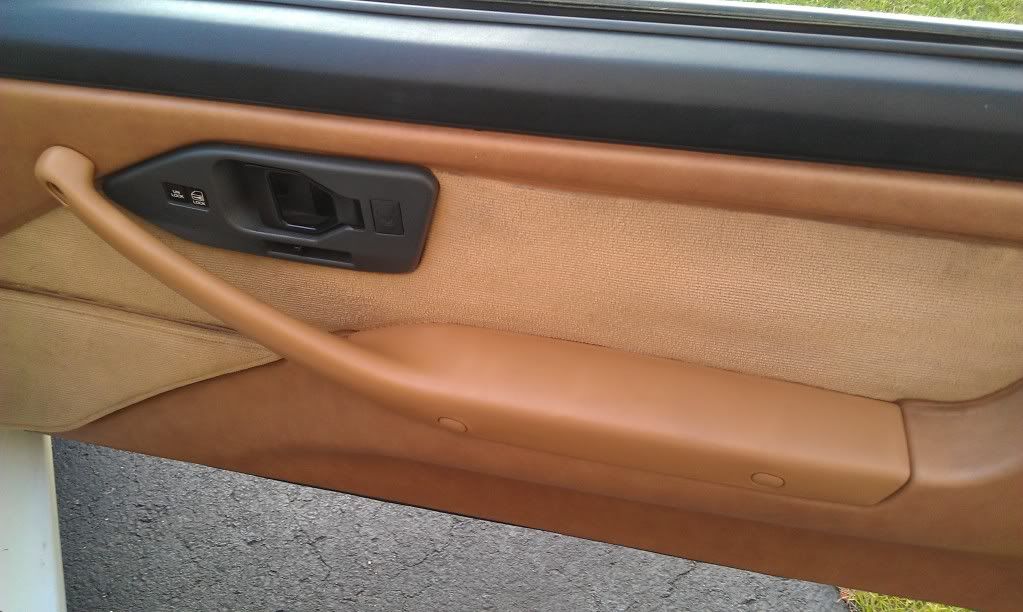
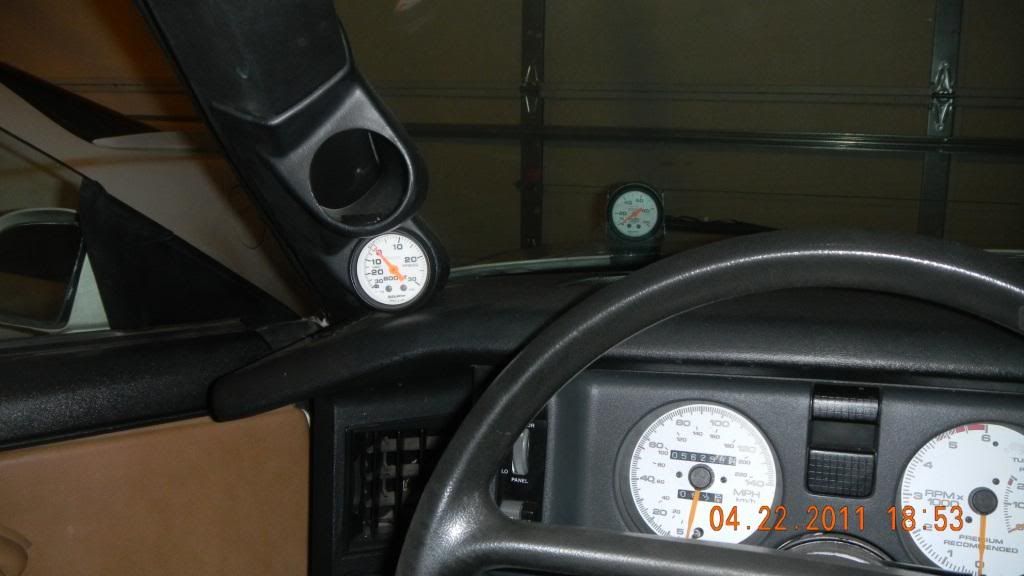
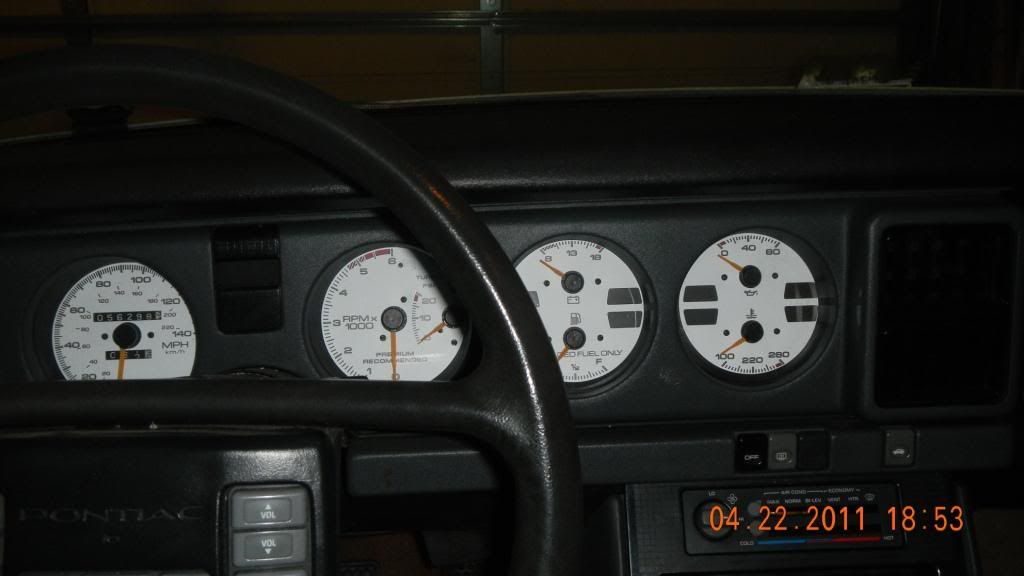
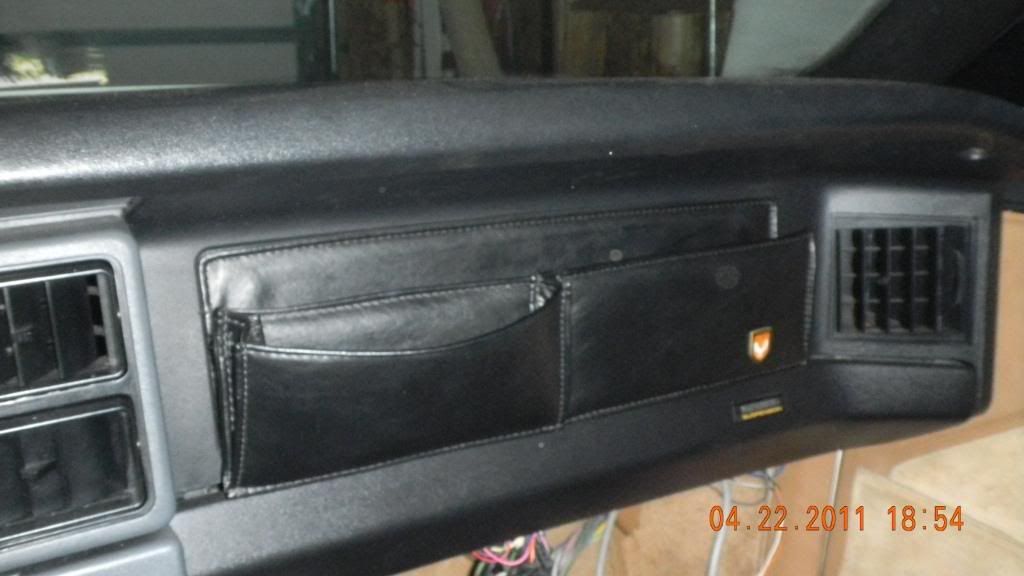
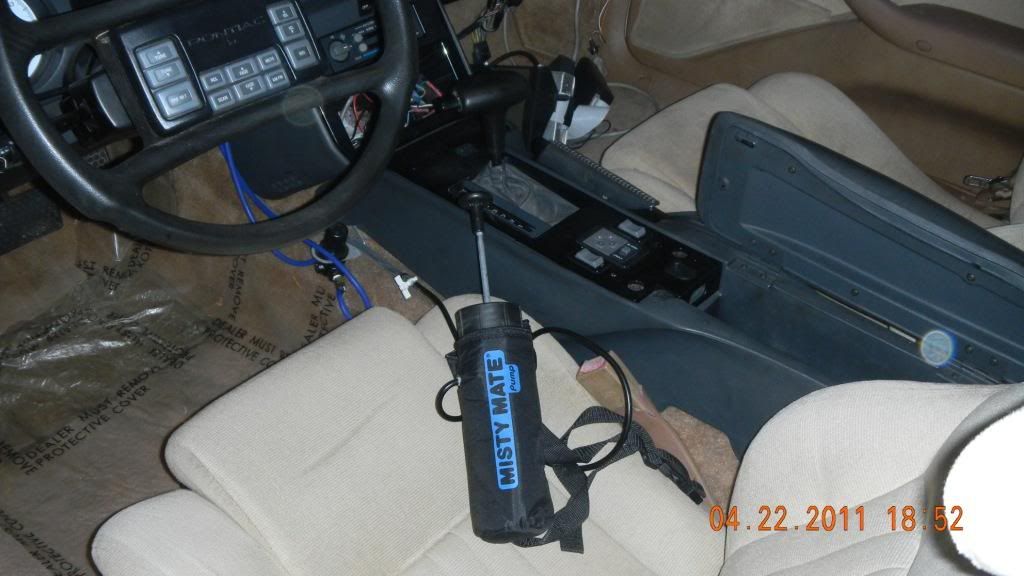
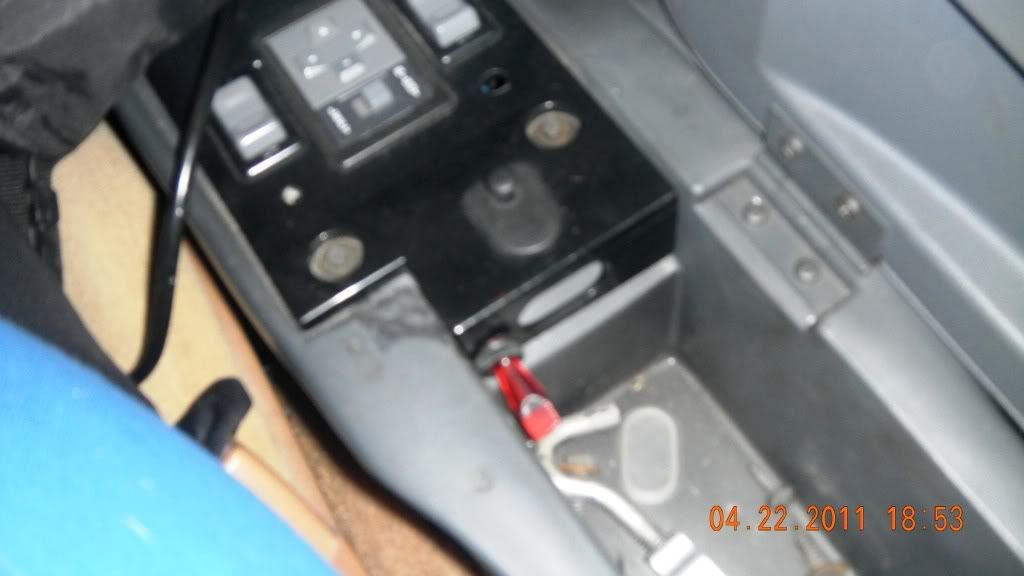
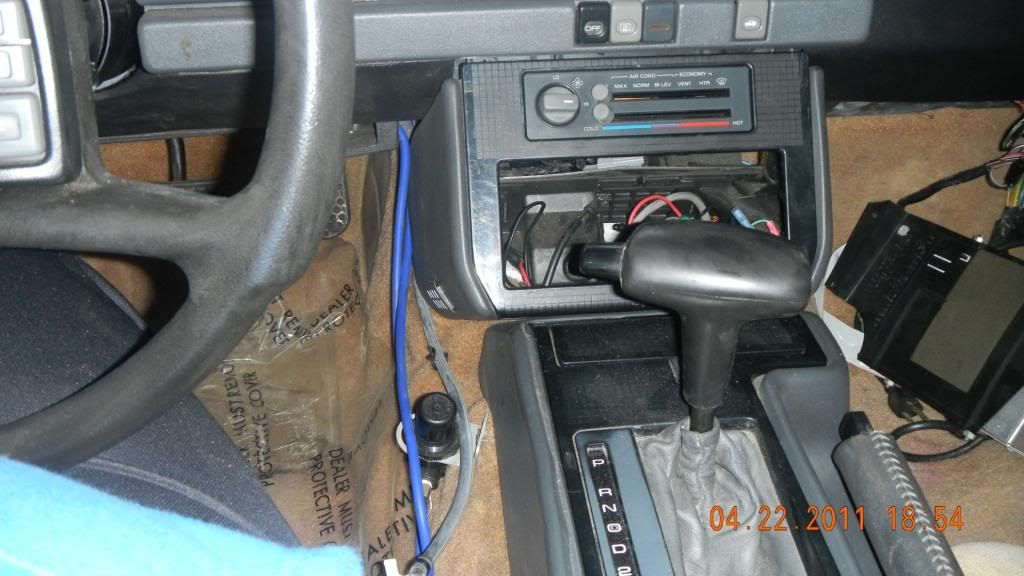
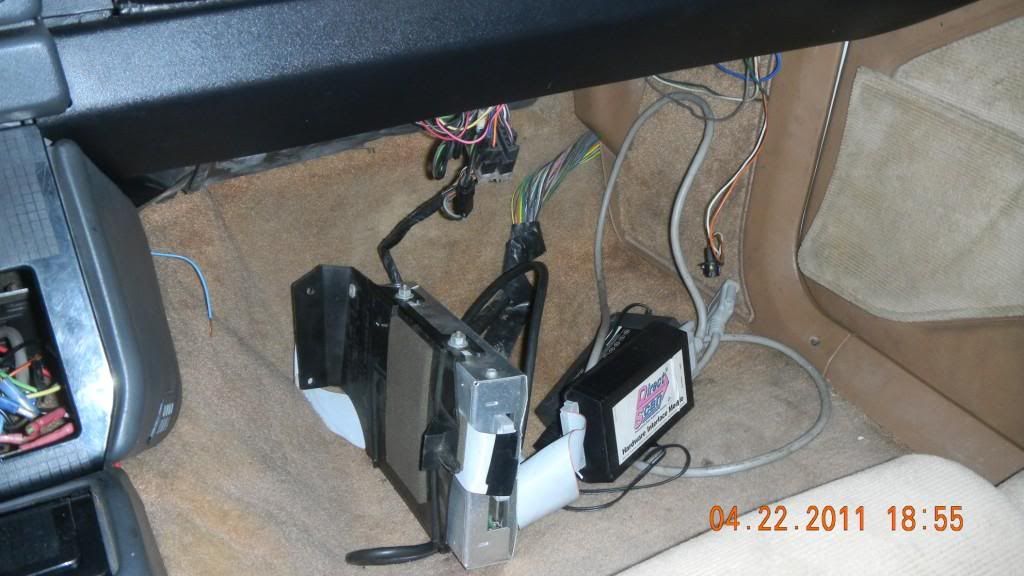
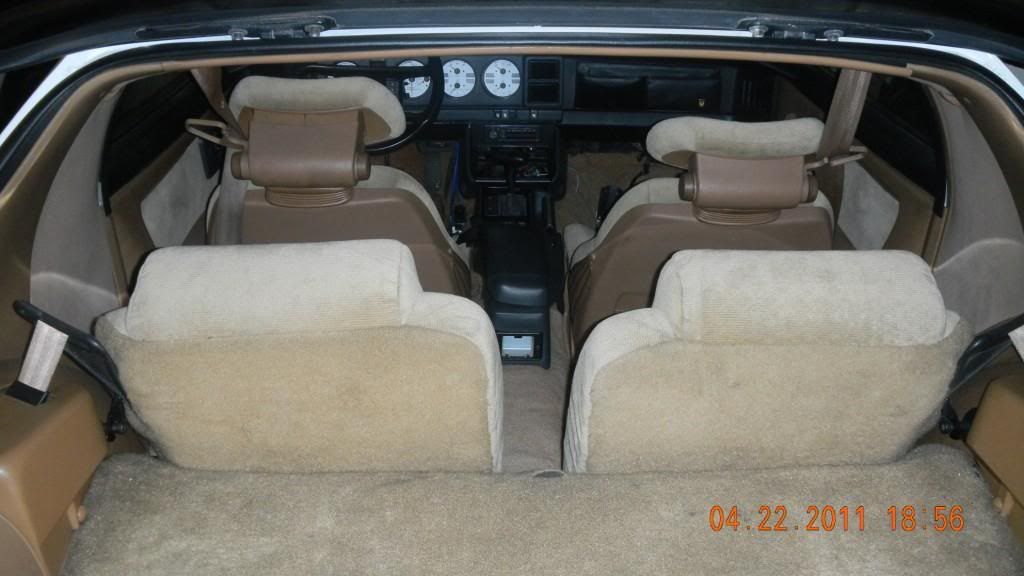
As far as the interior goes, the radio has been removed. The doors show heavy wear. The t-top bag and hatch privacy shade are missing too. The interior is in pretty good shape both carpet and cloth seats. The gauges have been changed to white faces which is unique and all work except for the gas gauge. The dash is in good shape. It has the column for extra gages on the driver side with a higher boost gauge installed. There is a plastic white bottle (Misty Mate pump) that has a push pump on it that runs along side the driver and I just set it in the center console. It is empty and not sure what it is. There is a red switch in the center console too. There is also a black knob along the drivers right knee. Any body have any ideas what these are? It also have a different computer set up and it is huge with a direct scan connected and just sitting in the passenger floorboard.

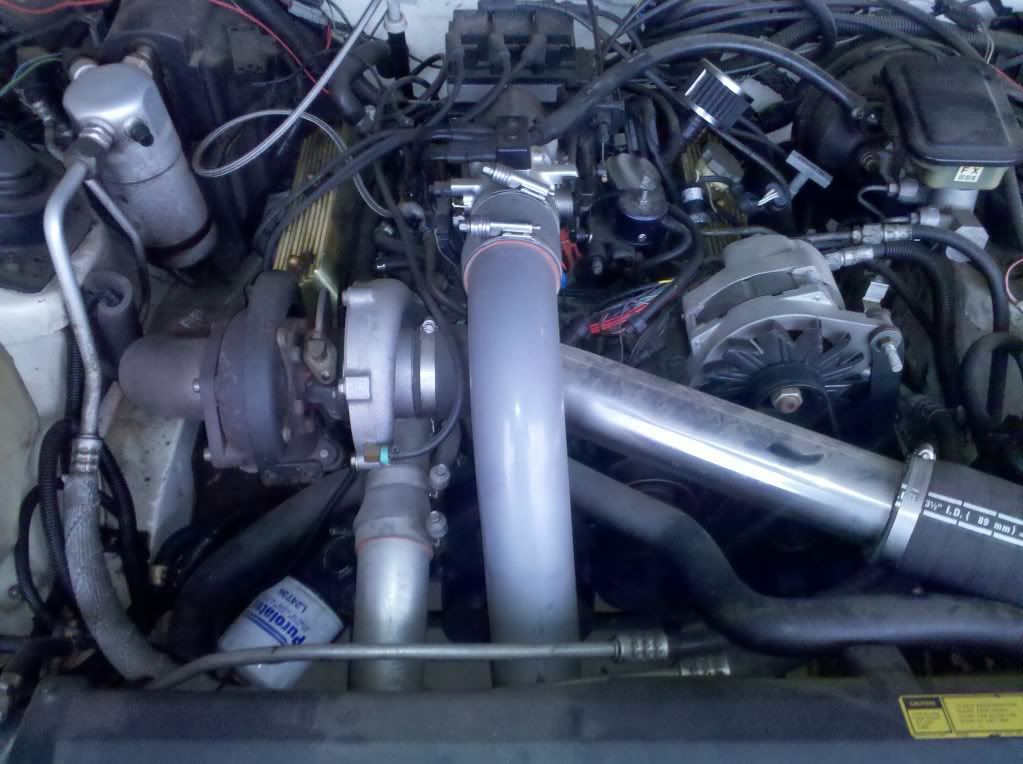
The engine, well I don't know where to start. The car starts right up and idles good, no obvious leaks in the engine bay or heavy exhaust out the back. It has a nice exhaust system with very shiny exhaust pipes. It sounds really strong. It drives right now, but a little scary. It run at high rpms in the gears and doesn't shift consistent. When you give it some some throttle, it sounds like it is boosting and the gauge on the column goes up, but it just feels like it is grinding and just doesn't have any power, like as if the parking brake was put on. So, the next drive in the car will be to Dennis's next week when he is ready to dig into this one.

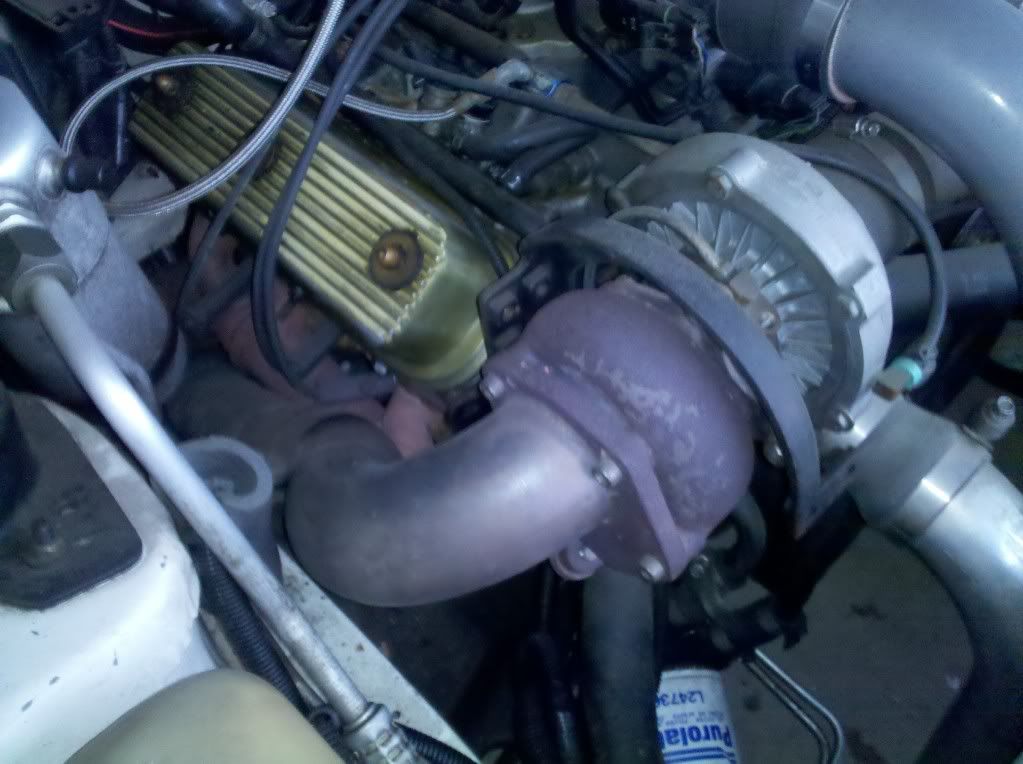
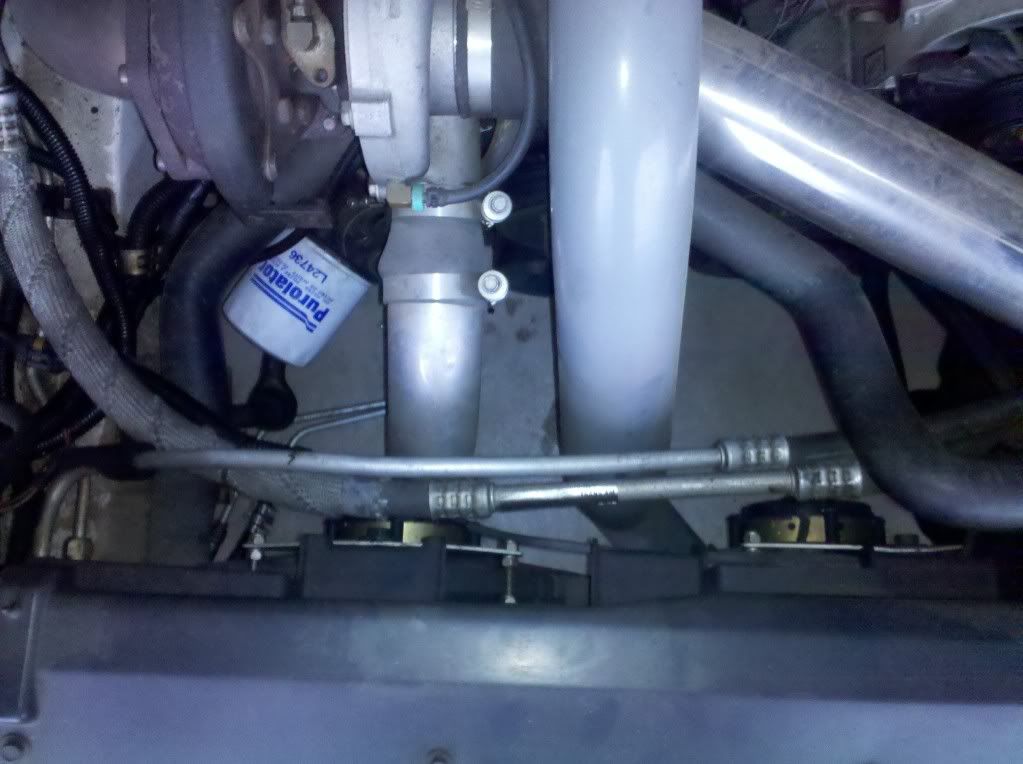
The guy I bought it from said he bought the car the way it is now and didn't know much about it other than it didn't really run right. I was hoping to have it done by the reunion but that might be a stretch. Check out the pics. Let me know if you guys have any ideas what some of this stuff is. Like the intercooler has been changed, but it looks like there is no radiator anymore? Doesn't make sense to me, but looks funny, like a big hole where the stock intercooler was. The bigger and longer piping looks different too, not to mention the turbo without the cover.
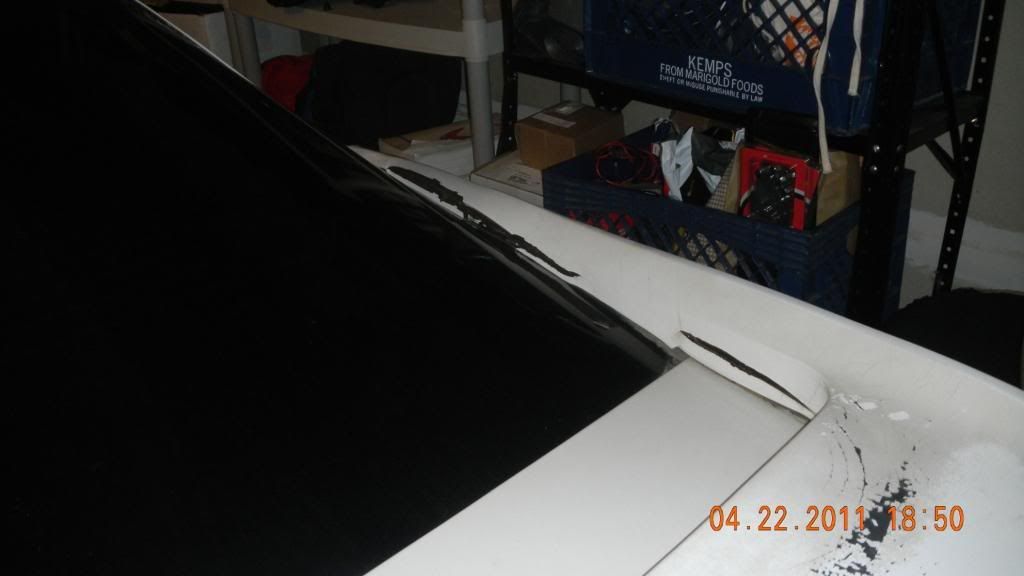
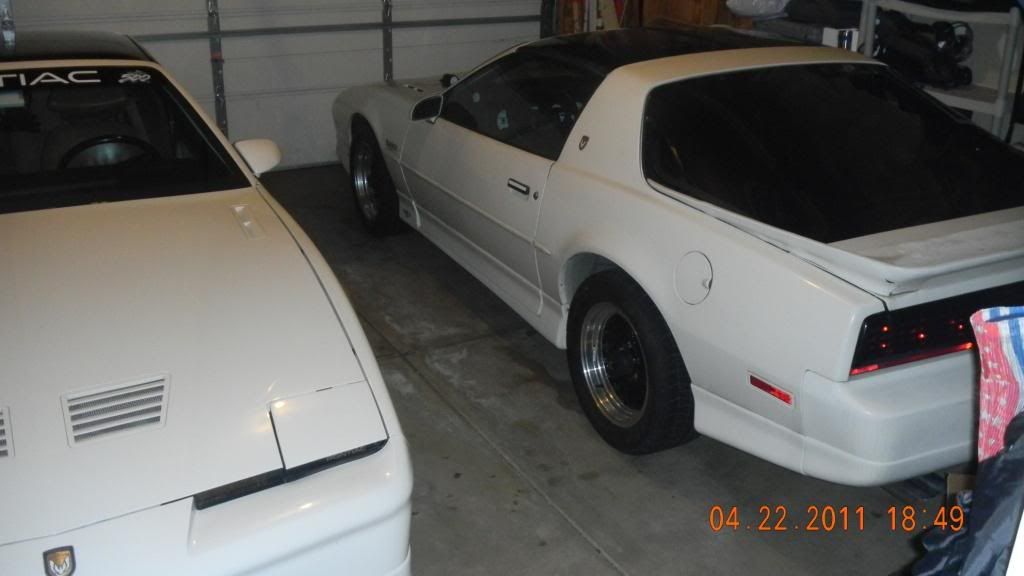
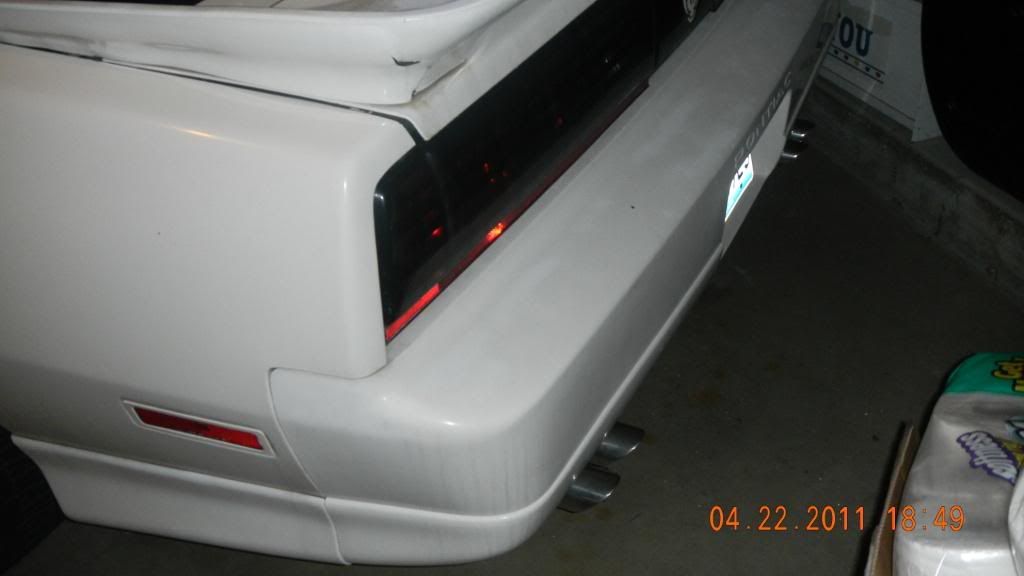
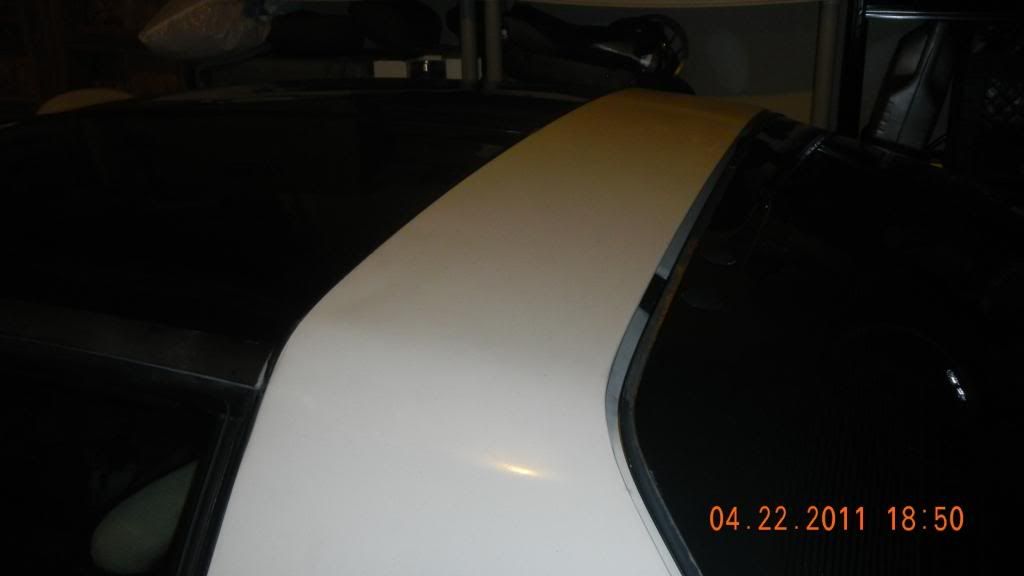
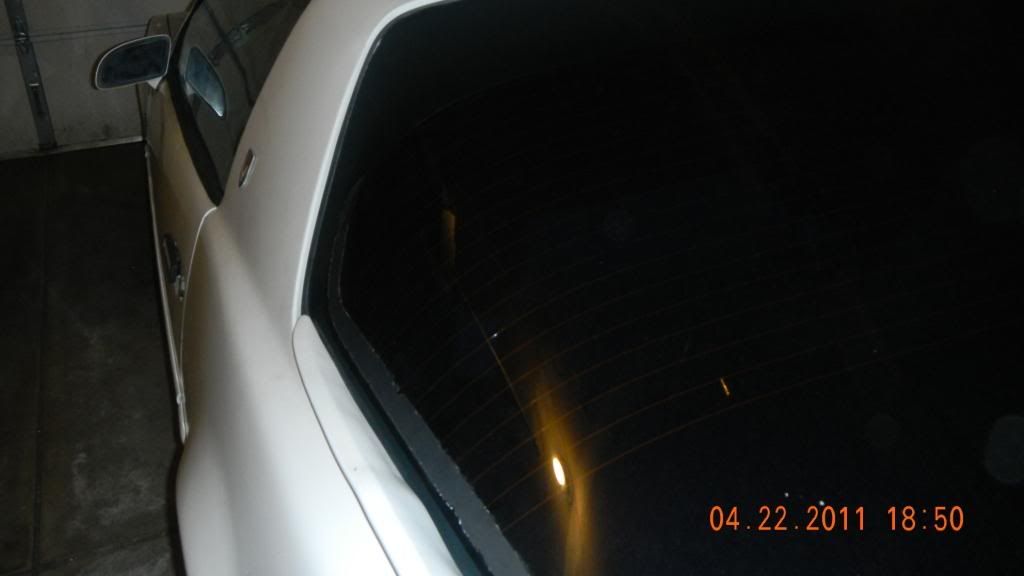
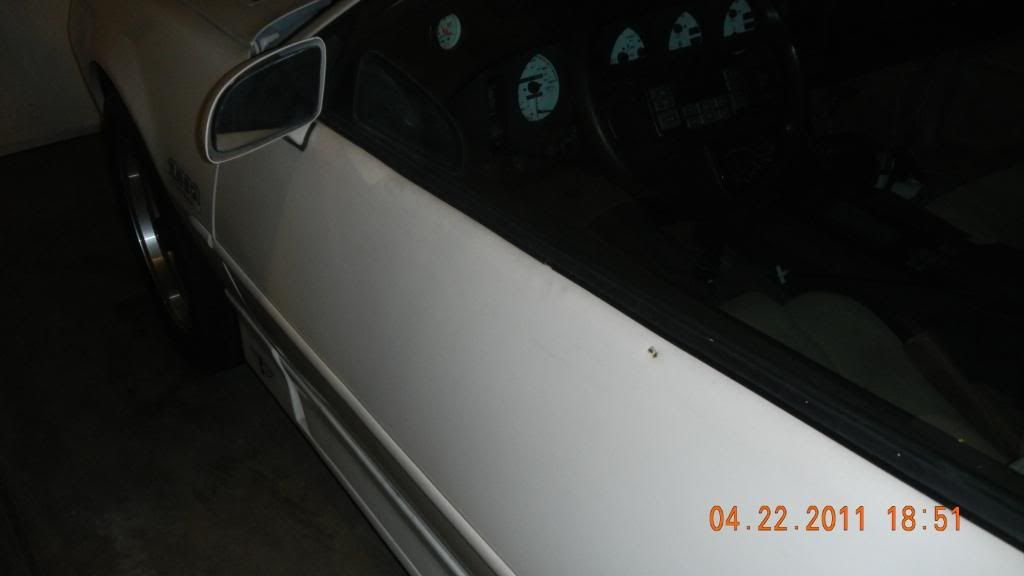
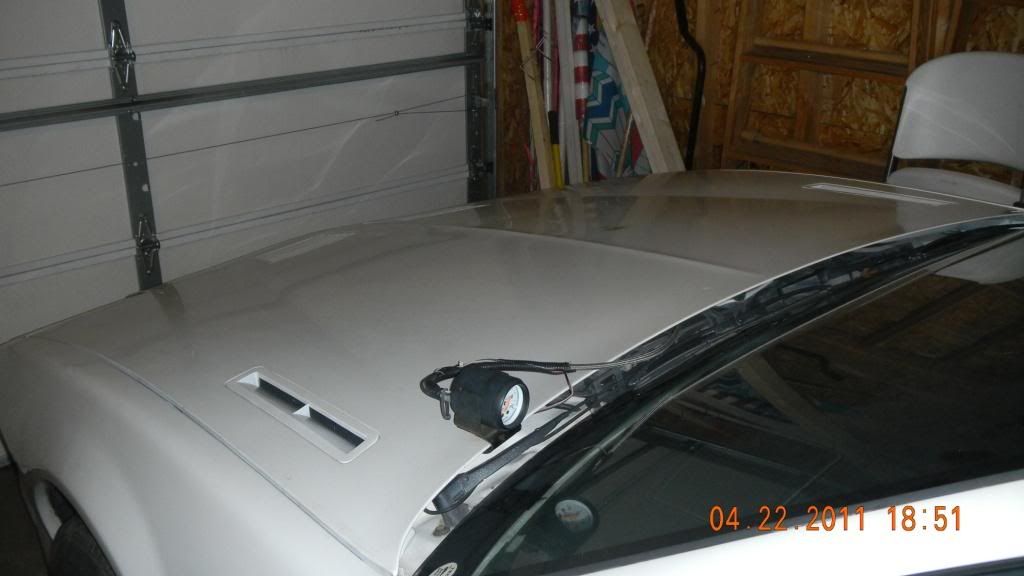
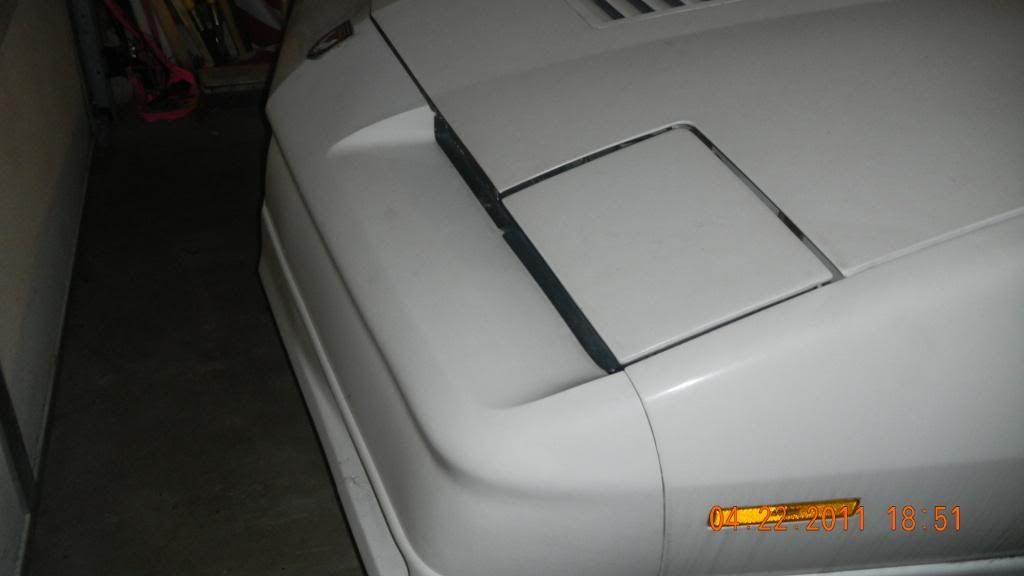
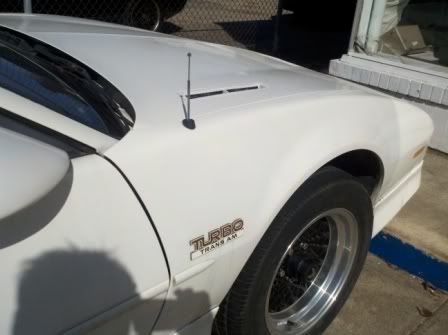
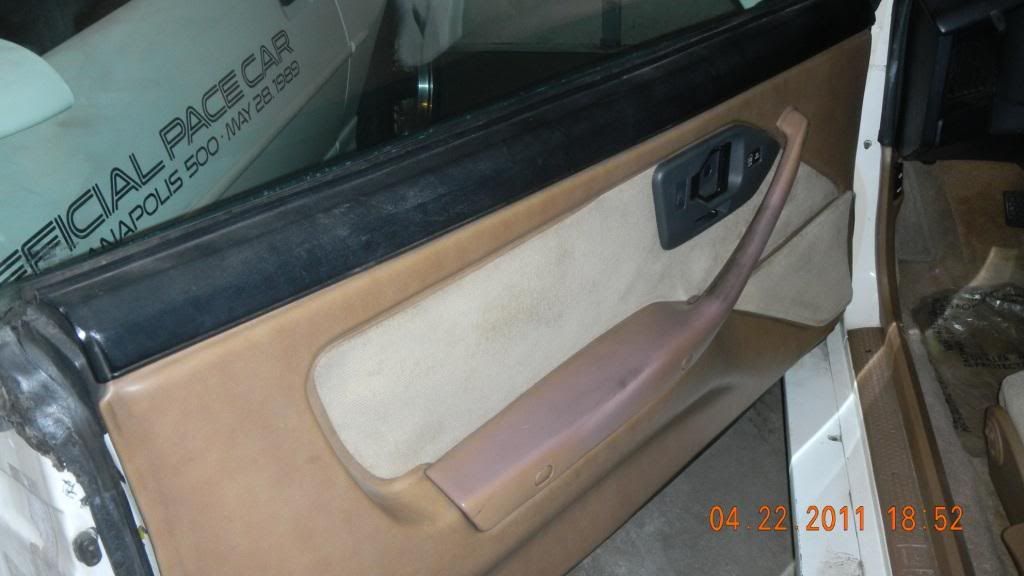
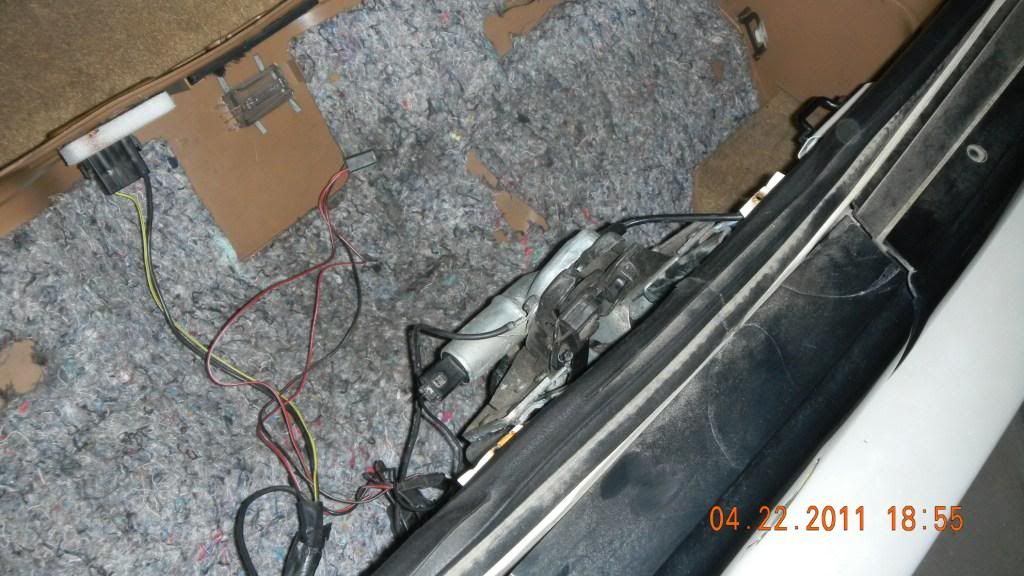


kymmee

Silver Member
#2
Sounds like you have your work cut out for you, but a good plan of action. Hopefully, you can bring her back to all her beauty and more. I can tell you that picture with the 2 cars in your garage back to front looks good!
 

Buckeyetroop

Well-Known Member
#3
Looking forward to the progress. Front mount intercooler, and the black knob by your right knee appears to be an adjustable boost controller. Direct scan with stock ecm. Hope its done for the reunion. Good luck.:toot:
 

Kman1971

Well-Known Member
#4
Doing some research on the Misty Mate, it looks like a cheap version of an alky kit. You could put water or alcohol in it and pump it manually when you want to cool the boost, not sure how you could drive and pump at the same time though.
 

Kman1971

Well-Known Member
#5
The transformation begins....,

with new set of tires on the back.
Firestone Firehawk WIDE OVAL Indy 500 245/50R16's and a new Radio. Will post pics of the radio once the custom faceplate is installed.
 

Mike Arrigo

Well-Known Member
#6
Is there some type of rearend in the car or did someone put extended rear wheel studs in for some reason? Looks good so far :) Also, I guess in order to use the Misty Mate, you would always have to have a passenger with a good forearm ride shotgun and pump away. LOL
 

Kman1971

Well-Known Member
#7
That was the first thing I thought of when I saw this. How do you drive and pump the misty mate at the time. LOL

The rear end was modded to a Ford 9", whatever that means, I'm still learning about it.
 

Quiky One

Silver Member
#8
That was the first thing I thought of when I saw this. How do you drive and pump the misty mate at the time. LOL

The rear end was modded to a Ford 9", whatever that means, I'm still learning about it.
It means you have a badass unbreakable rearend! :dance:

Your car has a lot of good modifications. I can see though where you will need to keep your eye on the end goal though. It will come together!

Jason
 

Kman1971

Well-Known Member
#9
Thanks Jason. I'm patiently working on it. Paint job up next and it will be gone for at least 3 weeks. I was hoping to get it to the mechanic first but his current project is taking a bit longer than expected. What should I do with the longer studs on the tires? I am thinking just paint them black to dress the up. Also, the fuel gauge does not work in the car. Do you think this is do to the fuel pressure gauge being used on the hood? I am going to removed the fuel pressure gauge and install a razors ally kit instead of the misty mate. Any advise or other suggestions?
 
#10
Thanks Jason. I'm patiently working on it. Paint job up next and it will be gone for at least 3 weeks. I was hoping to get it to the mechanic first but his current project is taking a bit longer than expected. What should I do with the longer studs on the tires? I am thinking just paint them black to dress the up. Also, the fuel gauge does not work in the car. Do you think this is do to the fuel pressure gauge being used on the hood? I am going to removed the fuel pressure gauge and install a razors ally kit instead of the misty mate. Any advise or other suggestions?
For the longer studs...that is easy. Cut them! I did this on the GN and it is a royal PITA, but it looks MUCH better than what is currently on the car.

Put the car on a lift and measure how long the studs need to be. I used whiteout to mark it and counted the threads. Then, take the wheels and tires off. I had an old set of lugnuts laying around so I put them on the longer studs all the way tightened down. I then cut the studs with a grinder (very tedius with ARP hardware) and removed the lugnut. It is important to do this so the threads do not get harmed in anyway. If you don't do it this way, you run the risk of ruining them when you put the lugs back on. Make sense?

Fuel gauge on the hood does not change a thing. Leave it be. It is good to have. You need to drop the tank and check the wires/ohm the sender/or replace the sendning unit. I would just replace it...

Good choice on the alky kit.

:cheers:
 
#12
Cool project. I agree with Jason, if you paint it first and the start wrenching on it, you have a greater chance of scuffing your new paint job. I think I'd get it mechanically sound, then work on the appearance. I think Black will be really cool. GTA's look great in black and this will be a cool tribute. Cloth interior rocks with black exterior.:hooray:
 

Kman1971

Well-Known Member
#13
Thanks for the advice. I am thinking a little more rationally now, and will wait to get it painted till the mechanical stuff is done. I am just anxious to get it done for the summer. This way when I pick it up from getting painted, it will be like picking up a new car. I'll work on the interior and wheel studs while I wait. That should keep me occupied. I have ordered the light repair kit for both TTA's. 613 has been acting funny and this TTA, the motors work, but neither light goes up.
Is this something a novice like me can tackle? Or should I just a pro do it. I have the service manual, does it walk you through the repair, or do the repair kits come with directions? I haven't received them yet.
Thanks again guys.

Kris
 

Mike Arrigo

Well-Known Member
#16
Thanks for the advice. I am thinking a little more rationally now, and will wait to get it painted till the mechanical stuff is done. I am just anxious to get it done for the summer. This way when I pick it up from getting painted, it will be like picking up a new car. I'll work on the interior and wheel studs while I wait. That should keep me occupied. I have ordered the light repair kit for both TTA's. 613 has been acting funny and this TTA, the motors work, but neither light goes up.
Is this something a novice like me can tackle? Or should I just a pro do it. I have the service manual, does it walk you through the repair, or do the repair kits come with directions? I haven't received them yet.
Thanks again guys.

Kris
I have done 4 of them, so i can help one day if you want me to. I also have all the parts to fix them since I bought a 20 foot roll of the bushing material to cut down. lol I will call you tomorrow since I have your number.
 

Kman1971

Well-Known Member
#18
May 2011 UPDATE

My mechanic on this project, Dennis, got a chance to dig into this one for a couple a weeks and now we have a plan of attack. He was able to pinpoint why the car was slow to boost in the low gears feeling like it was driving with the parking brake on. There were several issues contributing to this.

There was a exhaust leak on the turbo. He removed it and repaired it best he could. The surfaces were pitted and need to be redone, on his list to do, but that minor repair made the turbo spool faster and respond better in 1st and 2nd. The turbo inpeller was fouled a little but nothing bad and very operational still, spins good with no shaft play. The maf screen was removed I guess to get more airflow, but this may be how something got in there and fouled the turbo, so the maf will be replaced with a Gen 2 wide band set up. The turbo is a TE-63. According to the previous owner, all the mods were done 6-8 years ago. This turbo is still one of the largest today, and is rated for 750 HP and run low 10's. The previous owner showed me a track ticket from 2006 in which the car ran low 12's, so I think he was having these tuning problems all along. The knob by the drivers right knee is for setting the boost level. The Misty Mate has been removed. Maybe I can sell it on EBay. LOL

The car has 55 lb, low impedance injectors, bad spark plug wires, not connecting properly, stock ecm, aftermarket chip that doesn't seem to be compatible with the set up or injectors, the BLM was all out of whack, just overfueling, very rich. We couldn't figure out what kind of chip it is, no name or identification. Dennis put a 55 lb extender chip in right now till the new one gets here and it is running much better right now. The ignition and coil pack were replaced with a cheap unit that doesn't work right. Dennis replaced all these with his known working set and drove the car and it was considerably better, but the injectors, which were the best at the time had to have a modified ecm and matching chip to work right and this car does not have that.

So Dennis recommended 60lb injectors, new plug wires with proper fit, new ignition/ coil pack, new O2 sensor, Julio's alky kit, Gen 2 Maf Wide band set up with Baileys Chip to correct all the tuning issues and a scanmaster. This bird will fly, can't wait. He also ordered same alky kit and gen 2/chip set up for TTA #613. As soon as he is done with Rayder, he will install this on my other TTA (#613). Can't WAIT!!!

While we are waiting for the parts to arrive, I took the car home to get it out of Dennis's garage, so I was able to fix a couple of interior issues. The first was the rear console ash tray door was missing. Found a cheap replacement online for $5 buck and installed it and touched it up. I still have to clean up the center console, pretty dingy and messy with my touch up job. Also got the replacement hatch black security cover for $75 and T-top Bag for $30, and a couple tan plastic screws I was missing with the front end spoiler that he threw in.
You can see the stuff missing in the first pic.

Here is the replacement.


Next, I bought a 12 ounce can of Camel SEM interior aerosol for $16 on Amazon from the Eastwood Company to dye the two interior arm rests that were just disgusting. I cleaned and scrubbed them both with Simply Green first. Worked great, took two scrubbings and rinsing and they cleaned up really good and were very tacky. Then I coated the armrest with about 8 coats, probably used about half the can for both arm rests. Took about an hour to do, easy job. They look brand new and I would recommend this product for any interior job. Camel is the color and matches my stock interior perfectly. I am pretty sure beechwood is the technical name for the interior color, but they don't make a beechwood color, Camel is the closest, if not perfect match.
Here is the way I got the car.

Here is what it looks like now. :cheers:


I am missing the upper arm trim piece for the passenger door, like Jan was looking for before. I found one on the third gen forum and will install it when I get it. Seems like another common problem for these cars, that piece is ether missing or cracked.

That is all for now till the parts come in and I take it back for the updates.
Sorry to ramble on here, but this forum is a great way to document the project. And anyone that has the passion for these cars like me hopefully enjoys it.
Any advise would be greatly appreciated.
Just 2 short months till the reunion.
 

kymmee

Silver Member
#19
The arm rests came out looking great. I have the same SEM paint, and have used it on a door sill and the rear top plastic trim piece that holds up the headliner that everyone seems to over torque and crack out. I need that upper arm trim piece also, but for the driver side. Mine is still there but cracked. 1040 is looking better everyday. With the rate you are going, you'll have it back on the road in no time.
 

TTA984

Gold Member
#20
The SEM camel is a pretty close match for the interior beechwood, I used it on a door sill. Your arm rest came out very nice. I am looking for the trim ring that goes at the top of the arm rest, I noticed one of yours is missing also.:)
 

Jan Larsson

Administrator
Staff member
#21
Have to get a can of that SEM camel spray paint ... got one or two of those plastic trim pieces I can try and paint and see how they come out ...

Have to see if I can get a can of the paint in this country or not :-(
 

TTA984

Gold Member
#23
The SEM # for the camel paint is 15173
Some applications might require using the SEM plastic prep spray, before applying the paint.
 

Kman1971

Well-Known Member
#24
The arm rests came out looking great. I have the same SEM paint, and have used it on a door sill and the rear top plastic trim piece that holds up the headliner that everyone seems to over torque and crack out. I need that upper arm trim piece also, but for the driver side. Mine is still there but cracked. 1040 is looking better everyday. With the rate you are going, you'll have it back on the road in no time.
Thanks Kymee. Why did you have say anything about the rear plastic trim piece that holds up the headliner. LOL Actually, remarkably the one on Rayder is in excellant condition, no cracks. Then I had to check #613 and of course, the two outer screws were overtightened and both are cracked around them. Add that to the growing list. LOL
 

8289ta

Silver Member
#25
The SEM # for the camel paint is 15173
Some applications might require using the SEM plastic prep spray, before applying the paint.
I always use the prep spray. I painted an armrest with it years ago, and I thought for sure it would peel off, as it is a high wear area. It still looks good, and I think that the prep spray is the key - it softens the plastic and opens the pores.
 
Top Bottom